> ## Documentation Index
> Fetch the complete documentation index at: https://docs.osto.one/llms.txt
> Use this file to discover all available pages before exploring further.
# Quick Start Guide
> Five steps from a brand-new Osto account to a dashboard reporting live security telemetry. Most teams finish in under an hour.
If you haven't read [Core Concepts](/getting-started/core-concepts) yet, it's worth a 5-minute skim — every step below uses its vocabulary (Assets, Objects, Policies).
1. Go to [**osto.one**](https://osto.one) and click **Sign Up**.
2. Register with your work email, Google Workspace, or Microsoft account.
3. Enter the OTP sent to your email to verify.
4. Complete the short onboarding (organization name, primary contact).
5. You'll land on the **Insights → Dashboard** view.
Your home view — **Insights → Dashboard** — is the *Security Snapshot*: four headline KPIs (Security Adoption Score, Total Endpoints, Total APIs Discovered, Current Active Users) plus charts for Website Security Incidents, Top Web Categories, and Endpoint OS Distribution. They'll populate as you add assets.
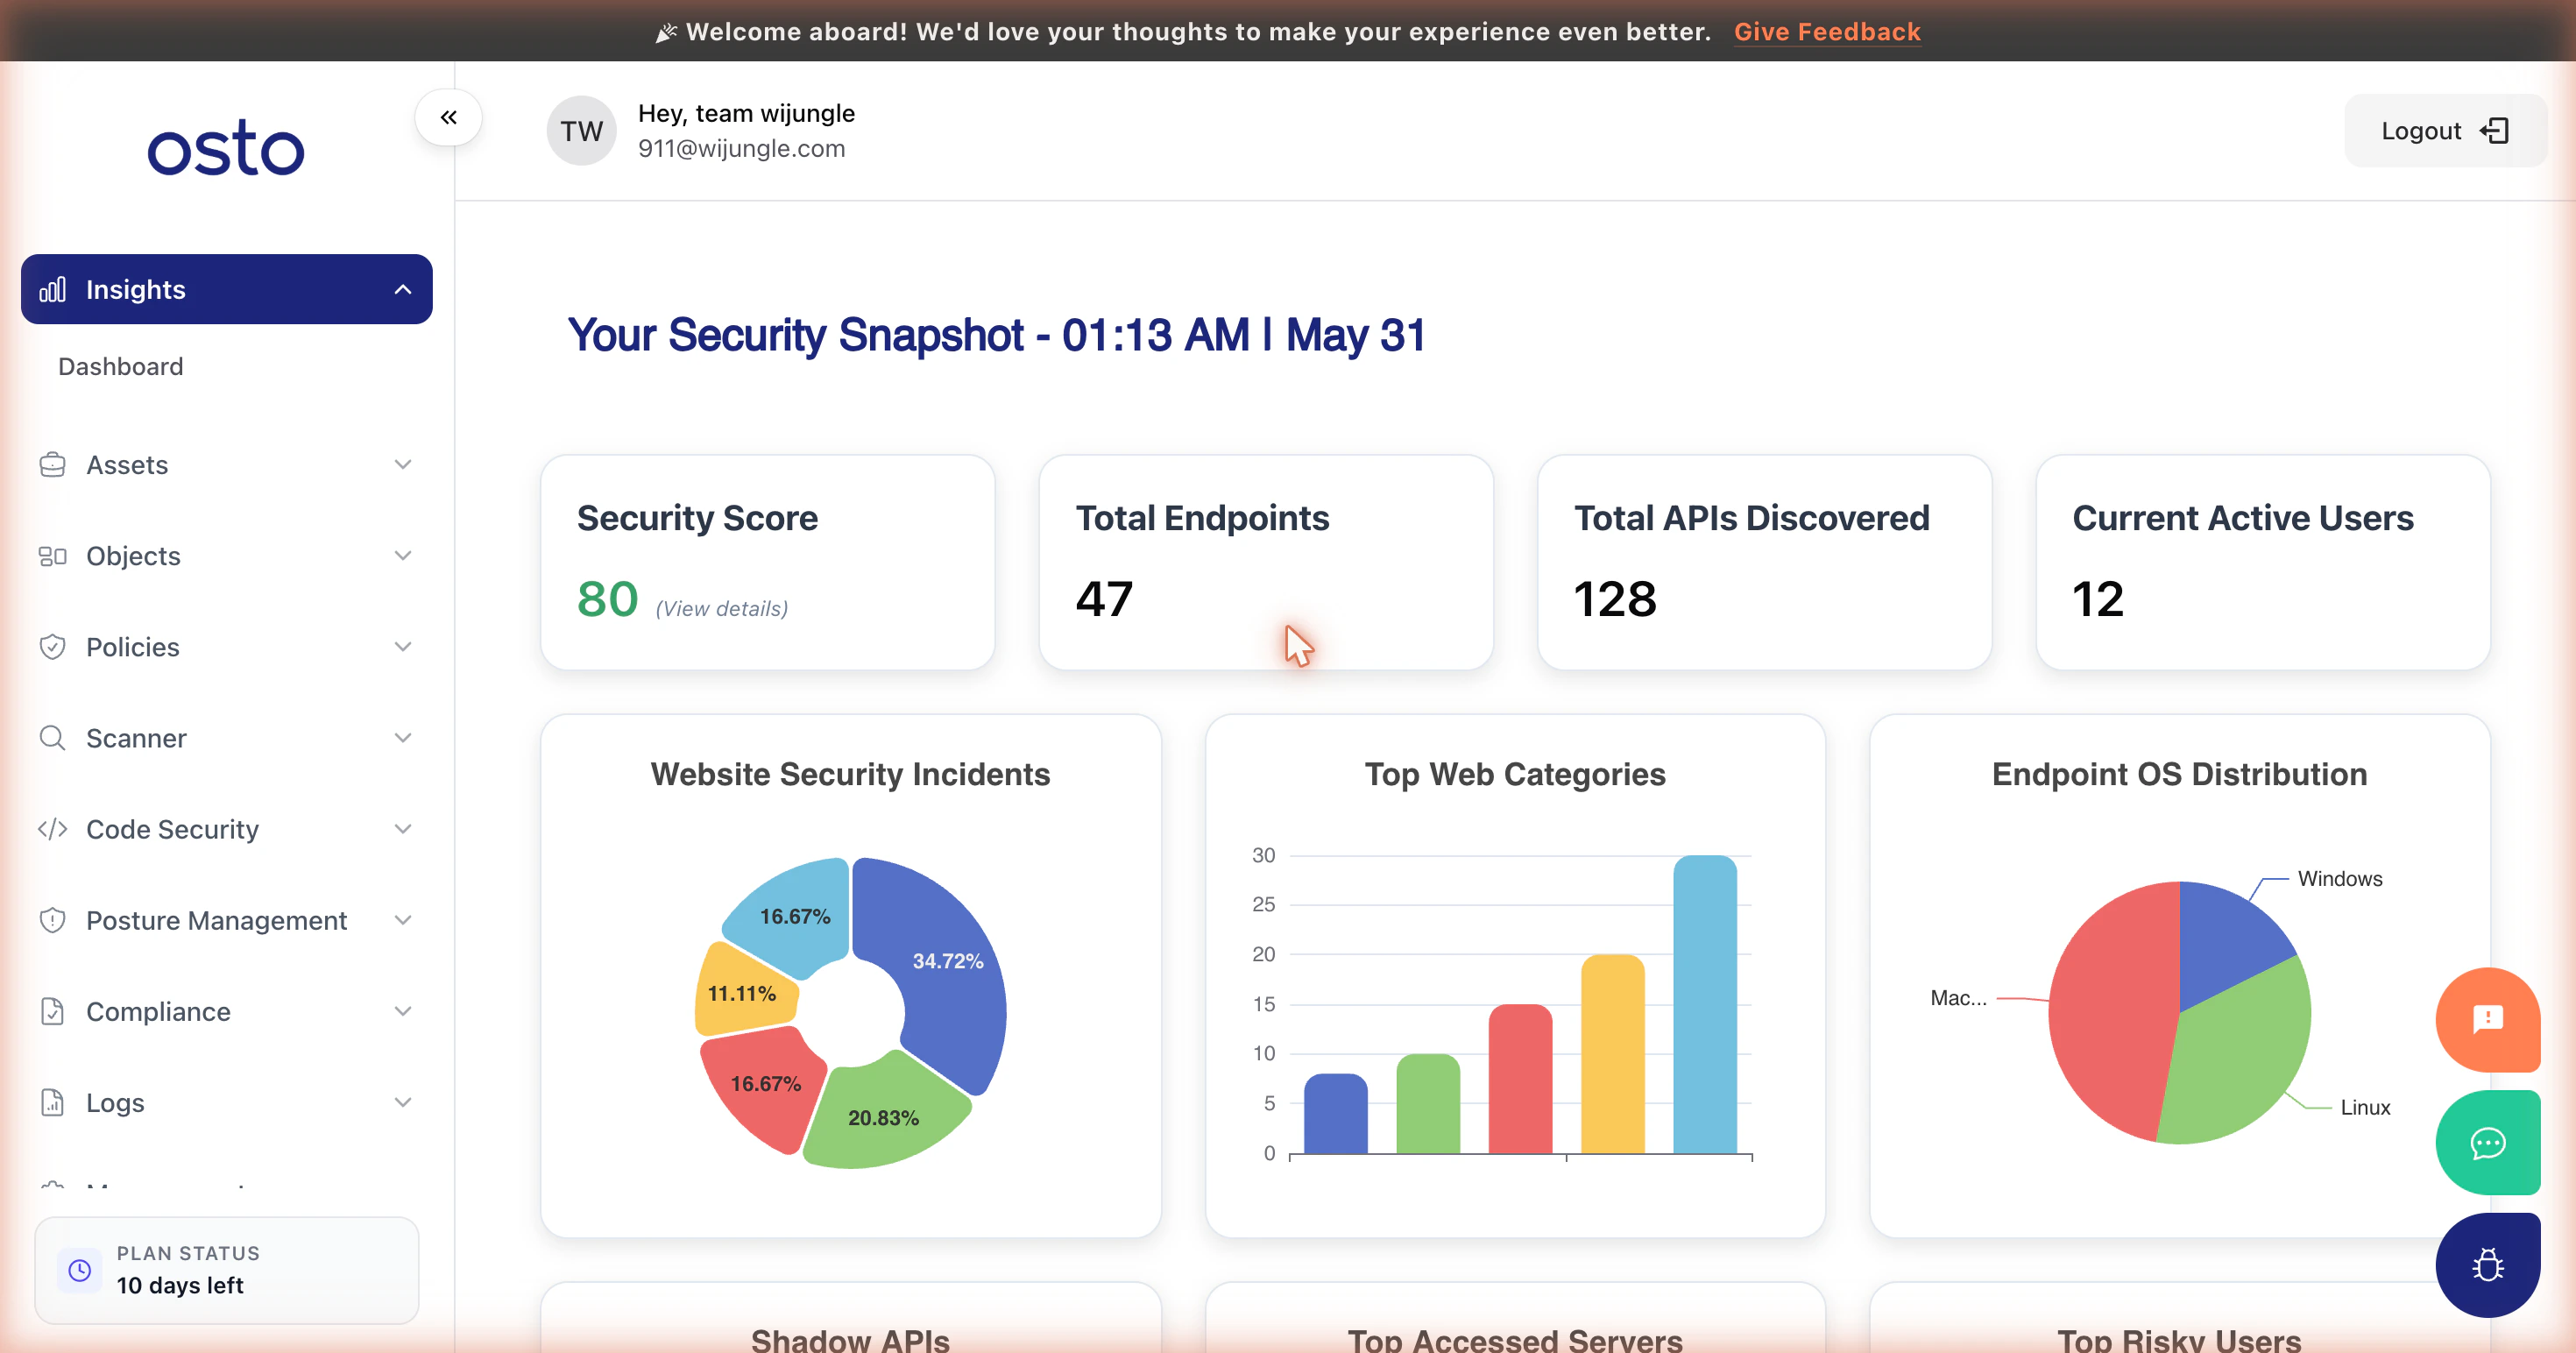 The **left sidebar** is your map to every module:
| Section | Purpose | When to use |
| ------------------------------------------------------ | ------------------------------- | -------------------------- |
| **Assets** | Register what you're protecting | Step 3 |
| **Objects** | Define reusable building blocks | Optional, as policies grow |
| **Policies** | Tune protection behavior | Step 4 |
| **Scanner**, **Code Security**, **Posture Management** | Continuous assessment | Step 5 |
| **Compliance**, **Logs** | Evidence and monitoring | Ongoing |
Go to **Assets** in the sidebar and add at least one of each:
* **Assets → Domains → Manage Domains** — add a domain or subdomain you want Osto to protect. APIs and certificates on that domain are discovered automatically.
* **Assets → Endpoint Users** — invite the people in your organization. They'll be prompted to install the Osto agent on their laptops; once installed, endpoint posture and DLP policies start applying.
* **Assets → Server Access → Secure Server** — register the servers you want Osto to broker access to. Follow the in-page setup instructions to install the connector.
For a deeper walk-through of any of these, see [Asset Management](/how-to-guides/asset-management/index).
Osto ships with sensible defaults — you only configure exceptions. Open **Policies** and review:
* **Policies → Endpoint Users** — Device Control, App Control, Domain Filtering, Data Leakage Prevention (with App File Access), and Global Policy for the people in your org. Detailed guide: [User Protection Policy](/how-to-guides/policy-configuration/user-protection-policy).
* **Policies → Domains** — Global Policies (DDoS, Bot) and Local Policies (Advanced, Custom Routing Rules, Policy Exceptions, API Discovery) for the websites you added. Detailed guide: [Website Protection Policy](/how-to-guides/policy-configuration/website-protection-policy).
* **Policies → Server Access** — rules for who can reach which Secure Server. See [Secure Server Access Policy](/how-to-guides/policy-configuration/secure-server-access-policy).
You're protected — now make the protection observable.
* **Posture Management → Cloud Security** — connect AWS, Azure, or GCP to start scanning your cloud configuration. Guides: [AWS](/how-to-guides/posture-management/connecting-aws), [Azure](/how-to-guides/posture-management/connecting-azure), [GCP](/how-to-guides/posture-management/connecting-gcp).
* **Scanner → Web Scanner / App Scanner** — kick off continuous vulnerability scans on the domains and mobile apps you registered.
* **Code Security → SAST** — wire your repository into CI for static analysis.
* **Compliance → Frameworks** — pick the frameworks that apply (SOC 2 Type II, ISO 27001, HIPAA, GDPR, PCI DSS); Osto starts mapping evidence automatically from everything you turned on above.
* **Logs** — Web App, Secure Server, Domain Filtering, Incident, Audit, and Auth logs are now flowing. Use them for daily monitoring and as evidence at audit time.
## You're live. What now?
Within an hour of finishing Step 3, the dashboard should be showing real activity. From here:
* Browse [How To Guides](/how-to-guides/asset-management/index) for module-specific walkthroughs.
* Skim [Best Practices](/support/best-practices) for configurations other teams have settled on.
* Bookmark [Troubleshooting Common Issues](/support/troubleshooting) and [FAQs](/support/faqs) for when something doesn't behave as expected.
Need help? Contact your Osto representative at [connect@osto.one](mailto:connect@osto.one) or post in your shared support channel.
The **left sidebar** is your map to every module:
| Section | Purpose | When to use |
| ------------------------------------------------------ | ------------------------------- | -------------------------- |
| **Assets** | Register what you're protecting | Step 3 |
| **Objects** | Define reusable building blocks | Optional, as policies grow |
| **Policies** | Tune protection behavior | Step 4 |
| **Scanner**, **Code Security**, **Posture Management** | Continuous assessment | Step 5 |
| **Compliance**, **Logs** | Evidence and monitoring | Ongoing |
Go to **Assets** in the sidebar and add at least one of each:
* **Assets → Domains → Manage Domains** — add a domain or subdomain you want Osto to protect. APIs and certificates on that domain are discovered automatically.
* **Assets → Endpoint Users** — invite the people in your organization. They'll be prompted to install the Osto agent on their laptops; once installed, endpoint posture and DLP policies start applying.
* **Assets → Server Access → Secure Server** — register the servers you want Osto to broker access to. Follow the in-page setup instructions to install the connector.
For a deeper walk-through of any of these, see [Asset Management](/how-to-guides/asset-management/index).
Osto ships with sensible defaults — you only configure exceptions. Open **Policies** and review:
* **Policies → Endpoint Users** — Device Control, App Control, Domain Filtering, Data Leakage Prevention (with App File Access), and Global Policy for the people in your org. Detailed guide: [User Protection Policy](/how-to-guides/policy-configuration/user-protection-policy).
* **Policies → Domains** — Global Policies (DDoS, Bot) and Local Policies (Advanced, Custom Routing Rules, Policy Exceptions, API Discovery) for the websites you added. Detailed guide: [Website Protection Policy](/how-to-guides/policy-configuration/website-protection-policy).
* **Policies → Server Access** — rules for who can reach which Secure Server. See [Secure Server Access Policy](/how-to-guides/policy-configuration/secure-server-access-policy).
You're protected — now make the protection observable.
* **Posture Management → Cloud Security** — connect AWS, Azure, or GCP to start scanning your cloud configuration. Guides: [AWS](/how-to-guides/posture-management/connecting-aws), [Azure](/how-to-guides/posture-management/connecting-azure), [GCP](/how-to-guides/posture-management/connecting-gcp).
* **Scanner → Web Scanner / App Scanner** — kick off continuous vulnerability scans on the domains and mobile apps you registered.
* **Code Security → SAST** — wire your repository into CI for static analysis.
* **Compliance → Frameworks** — pick the frameworks that apply (SOC 2 Type II, ISO 27001, HIPAA, GDPR, PCI DSS); Osto starts mapping evidence automatically from everything you turned on above.
* **Logs** — Web App, Secure Server, Domain Filtering, Incident, Audit, and Auth logs are now flowing. Use them for daily monitoring and as evidence at audit time.
## You're live. What now?
Within an hour of finishing Step 3, the dashboard should be showing real activity. From here:
* Browse [How To Guides](/how-to-guides/asset-management/index) for module-specific walkthroughs.
* Skim [Best Practices](/support/best-practices) for configurations other teams have settled on.
* Bookmark [Troubleshooting Common Issues](/support/troubleshooting) and [FAQs](/support/faqs) for when something doesn't behave as expected.
Need help? Contact your Osto representative at [connect@osto.one](mailto:connect@osto.one) or post in your shared support channel.