

- Open the AWS Management Console and sign in with your AWS credentials.
- You’ll need to collect a few identifiers and credentials during this setup — follow the steps below carefully.
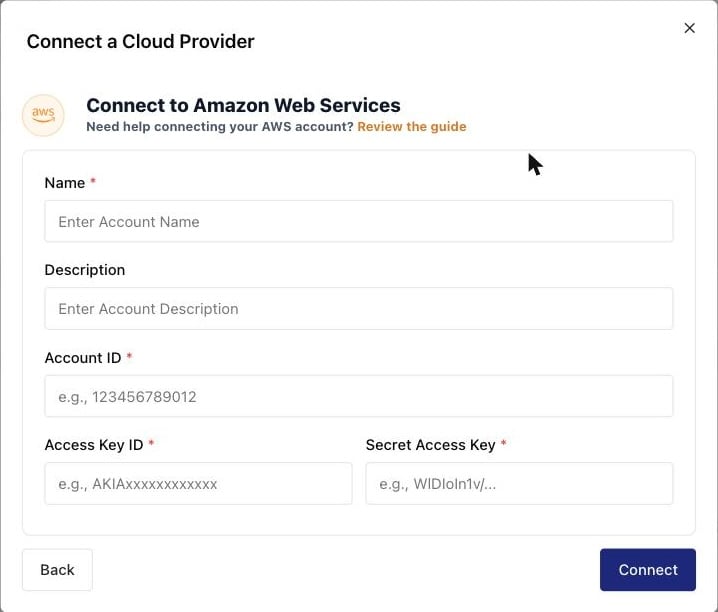
The Amazon Web Services connection form in Osto.
1
Find Your AWS Account ID
Your AWS Account ID uniquely identifies your AWS account and is required for integration.To find it:
- In the AWS Console, search for IAM.
- Open the IAM (Identity and Access Management) service.
- On the IAM Dashboard, locate the AWS Account section.
- Copy the Account ID and save it — you’ll need it later.
2
Create or Use an Existing IAM User
Osto connects to AWS using an IAM user with restricted, read-only permissions. If you don’t already have one, create it:
- In the IAM sidebar, click Users.
- Click Create user.
- Enter a user name (for example,
osto-cloud-security-posture-management). - Click Next.
3
Assign Permissions to the IAM User
Osto requires read-only access to scan and assess your cloud resources. Assign the following AWS-managed policies:
- Under Set permissions, choose Attach policies directly.
- Search for and select the following policies:
- SecurityAudit
- ViewOnlyAccess
- Click Next, review details, and then click Create user.
4
Create Access Keys
Osto authenticates using access keys associated with your IAM user. To create one:
- Return to IAM → Users.
- Click on the user you created.
- Go to the Security credentials tab.
- Scroll down to Access keys and click Create access key.
- Choose Third-party service (for integrations and monitoring).
- Check the confirmation box and click Next.
5
(Optional) Add a Description Tag
- Add a tag description such as “Osto integration key for monitoring resources”.
- Click Create access key.
6
Retrieve and Secure Your Keys
After the access key is created, the console will display:
- Access Key ID
- Secret Access Key
7
Fill in the Osto Cloud Connector Form
In the Osto platform, open the Connect a Cloud Provider window and select Amazon Web Services (AWS).Fill in the fields as follows:
- Name: A friendly name for your AWS connection (e.g., “Prod AWS Account”).
- Description: Optional description for easier identification.
- Account ID: The AWS account ID you copied earlier.
- Access Key ID: The Access Key ID from the IAM user you created.
- Secret Access Key: The Secret Access Key generated in the previous step.
8
Verify Connection
After connecting successfully:
- Your AWS assets will start syncing automatically.
- The Osto Dashboard will display asset count and necessary metrics.
- The connector’s status will change to Active.
Permissions Reference
At minimum, the IAM user must have:SecurityAuditViewOnlyAccess
Summary of Required Values
Troubleshooting
Connection fails — verify attached policies
Connection fails — verify attached policies
If the connection fails, verify that the IAM user has both SecurityAudit and ViewOnlyAccess policies attached.
Check Access Key and Secret
Check Access Key and Secret
Double-check that your Access Key ID and Secret Access Key are correct.
Lost Secret Access Key
Lost Secret Access Key
If the Secret Access Key is lost, create a new access key — it cannot be retrieved later.
Network connectivity
Network connectivity
Ensure your network allows outbound connections to Osto’s API endpoints.