Path: Scanner → Web Scanner
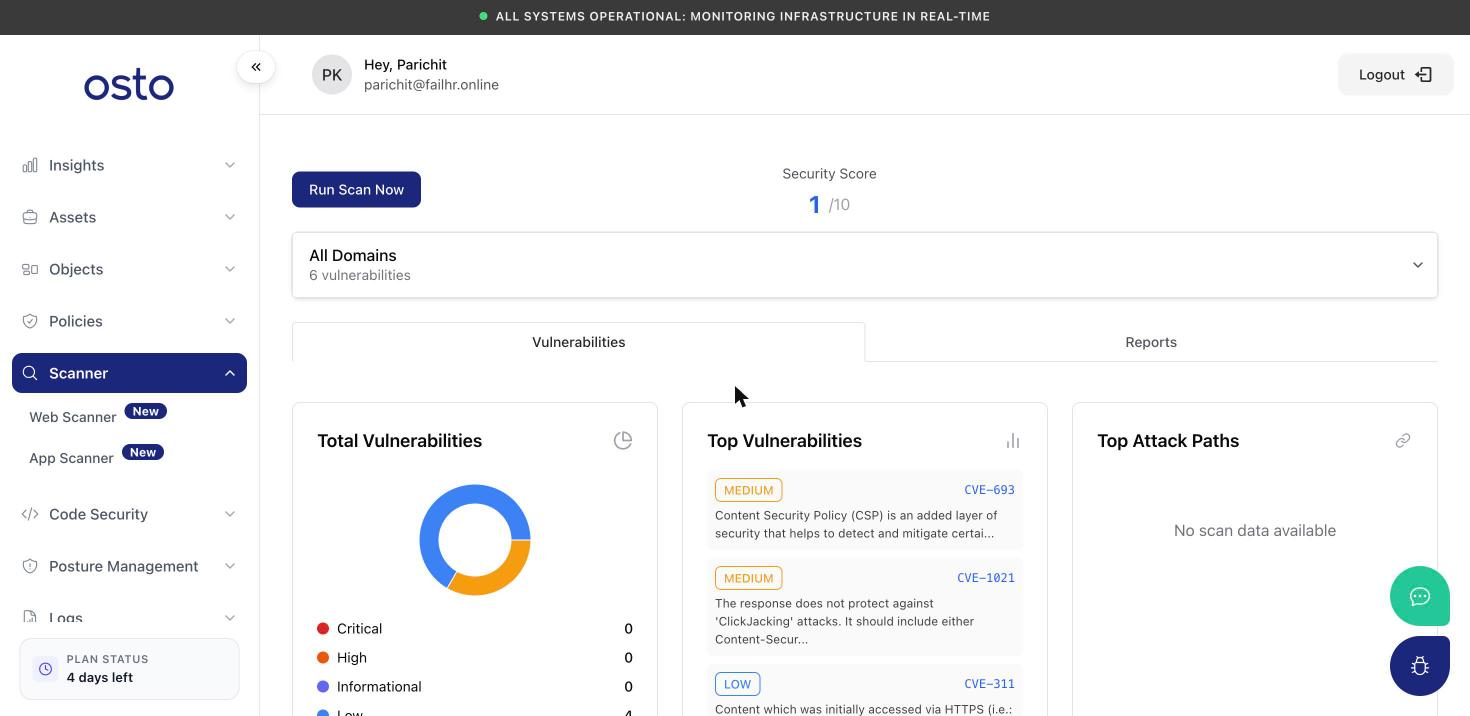
The Web Scanner overview — security score, vulnerability counts by severity, and top findings.
Run a scan
Click Run Scan Now (top-left) to start a scan immediately — there’s no extra setup or dialog. A confirmation banner appears: “Scan started — We have started your scan. Results will appear shortly.” The scan runs in the background against the domain currently selected in the domain dropdown (or across all domains if that’s selected). Results populate the page automatically once the scan completes.The scanner only assesses your sites — it never modifies them. You can run a scan as often as you need.
Choosing what to scan
The domain selector below the score lets you focus on a single site or view everything together:- All Domains — the aggregated view across every domain you’ve registered, with a combined vulnerability count.
- Individual domain — each registered domain is listed with its own vulnerability count and scan status (for example, “Not scanned” until its first scan completes).
Security Score
At the top of the page, Osto shows a Security Score out of 10 with a plain-language rating beneath it (such as High Security). The score reflects the results of your most recent scan for the selected scope, giving you an at-a-glance sense of where a site stands.Vulnerabilities tab
The Vulnerabilities tab is your results dashboard, organized into three summary views plus a detailed findings table:
Before your first scan returns data, each view shows “No scan data found yet.”
All Vulnerabilities table
Below the summary views, the All Vulnerabilities table lists every finding from the scan:
The table is paginated, with a selectable page size.
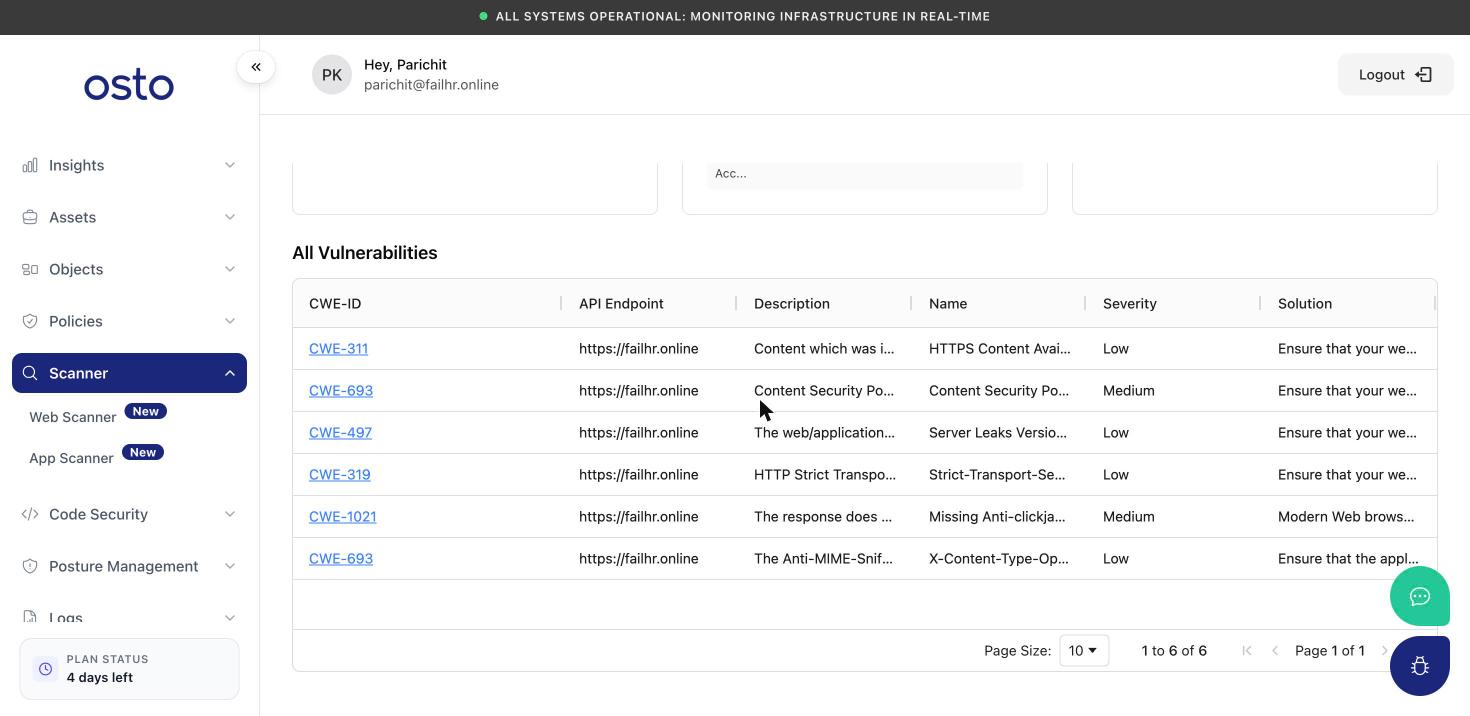
The All Vulnerabilities table lists every finding with its identifier, severity, and recommended fix.
Finding details
Click any finding’s identifier to open a Vulnerability Details panel with the complete write-up: severity, the affected endpoint and URL, a full description and recommended solution, the scanner’s confidence level, the supporting evidence, and tags. The identifier also links out to the public reference for that weakness.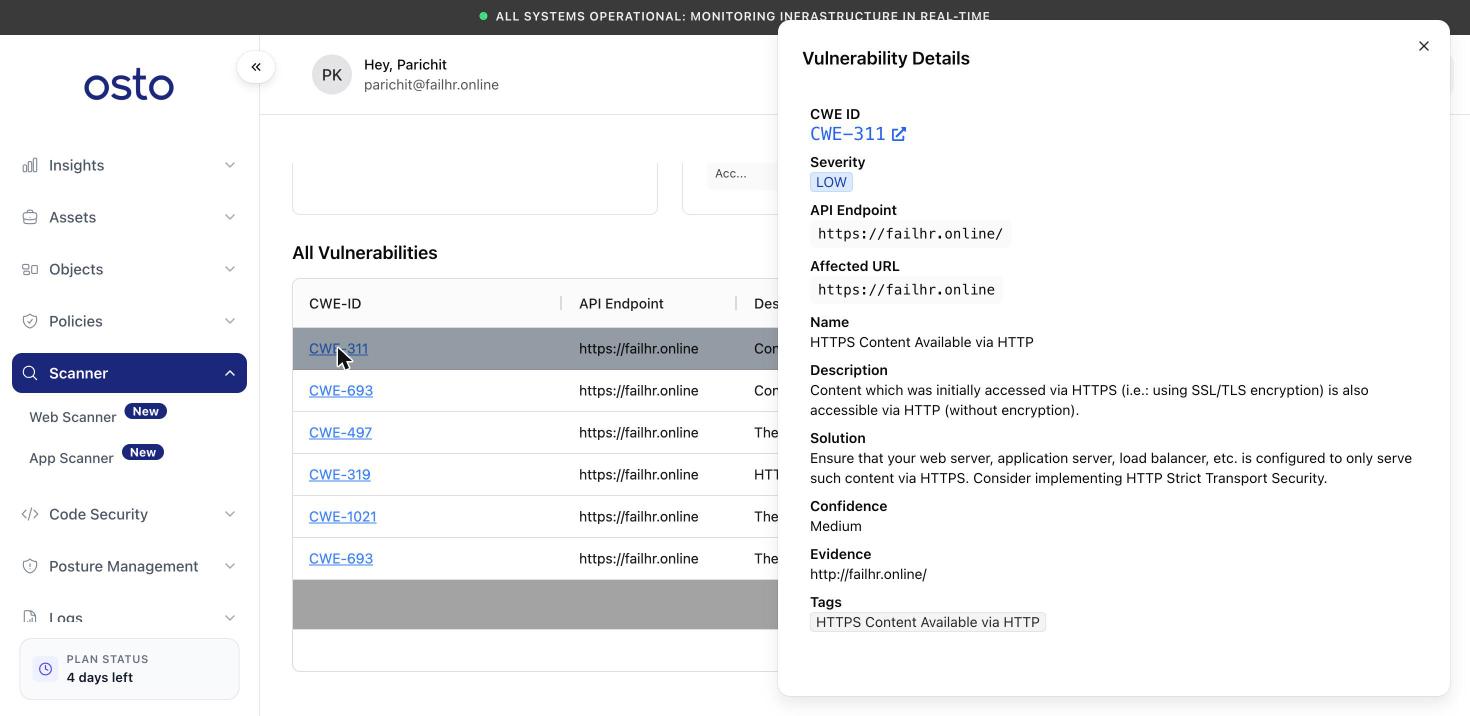
Vulnerability Details — the full write-up for a single finding, including evidence and a recommended solution.
Reports tab
The Reports tab keeps your generated security reports and explains the delivery cadences:- Security Reports — the list of reports Osto has generated. It’s empty until your first report is produced.
- Reports Schedule — describes how often reports are delivered:
- Daily Reports — delivered within 24 hours of the selected daily schedule.
- Weekly Reports — delivered within 7 days of the selected weekly schedule.
- Monthly Reports — delivered within 30 days of the selected monthly schedule.